Before I talk about my travel photography equipment and the editing software I use, let me tell you that this is an old post. I’ve changed a lot of my travel photography equipment lately. Currently writing an updated version of the article.
So either wait for the new article to release or read what travel photography equipment and editing software I was using back in the day. One reason to read this outdated blog is that it can give you a good insight into budget photography equipment. If you are just starting with travel blogging, this equipment is more than good to start with.
I would also like to share tips on how to start a professional travel blog if, at all, it is relevant. And if it is, you may also be interested in reading how to make money from blogging.
Now let’s start with my travel photography equipment and the photo editing software I was using…
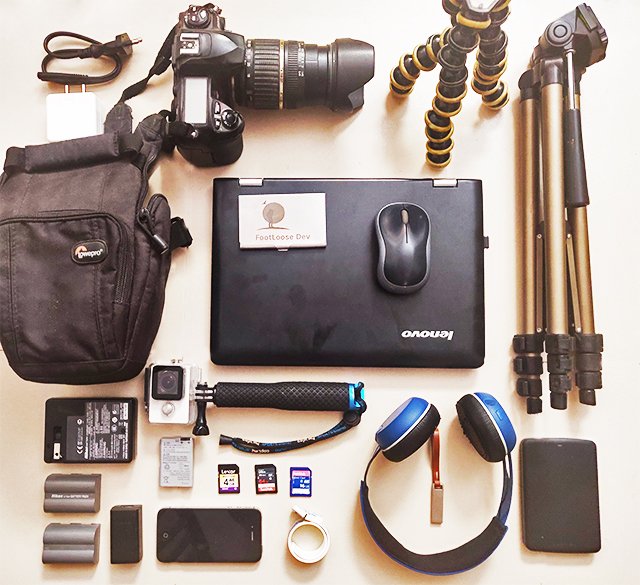
Because I fund my travels as best I can while working from the road, I carry a big collection of photography equipment — from my camera to hard disks to tripods (yes, I often carry two tripods with me).
My electronic travel-blogging and photography gear is, by far, the heaviest part of my setup which often even makes me consider carrying that extra t-shirt. But then again, my travel photography gear is the most important thing for me, particularly when I am away for a long. It keeps the content on my blog going.
Here’s the overview of the photo editing software I use and the travel photography equipment like camera, tripod and other stuff I use for producing to backing up my images while on the go.
Also, read these travel photography tips and see a couple of my photo blogs to see the kind of pictures I click on before we continue with the topic at hand. See Bodoland Dwijing’s photos and these Europe pictures.
Travel Photography Equipment
Sony Alpha 6300 with a 50mm 1.4 and a 16-50 kit lens: I have recently (about 6 months ago!) shifted from my Nikon D5200 to a mirrorless Sony. And this happened because of two reasons: one because my previous camera was stolen in Bratislava forcing me to buy a new camera and two, I wanted to switch to something lighter and compact, and the Sony Alpha series felt like a perfect alibi. Here’s a resource I have pulled for some good tripods if you’re looking for one.
Before I had Sony I always wondered how a mirrorless camera can compete with a traditional DSLR but trust me with all the truth in me, a mirrorless works just as efficiently as a DSLR does, with the added perk of a compact size. Sony Alpha series moreover offers the fastest autofocus than any other camera series making it perfect for travel bloggers. It has inbuilt wifi and NFC making it easier to share photos and do a lot more than you can imagine. I cannot, at least in the near future, can think of switching to any other camera brand.
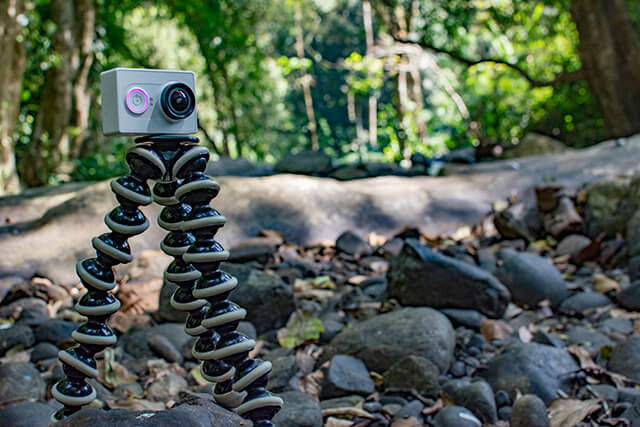
Go Pro Hero 7 Black: There are many action cameras out there like SJCam and others but they lack behind in quality. Hero GoPro, despite being a little expensive led the crowd. I have personally used Xiaomi YI in the past but have recently shifted to Hero GoPro 7 and I cannot express in words how happy I am with the transition. Hero GoPro offers amazing video stabilization (as a gimble does).
At INR 28k, though Hero Go Pro cost me a fortune, I am super happy with the results and suggest you get one for yourself if you are into vlogging and adventure sports, as I am. Find me on Youtube with the username ‘Footloose Dev’ to see some videos as I travel around the world on my motorbike.
One Plus 6 Camera Phone: Not sure if it’s just ‘one plus 6’, but I like calling it ‘one plus 6 camera phone’ because that’s what it is: a camera phone. Since I got it, I’ve been often leaving my other cameras behind — particularly if I am not clicking pictures for a paid assignment and just click with my one plus 6. It gives you an amazing bokeh effect, optical image stabilization, face clearing for better selfies and even slow-mo recording at 480 fps. There’s nothing more one can ask for, from a 30k device that gives you all that on top of using it as a mobile.
Lenovo Yoga: I have always been a Windows user, over a fancy Mac, and the reason is: easy connectivity. For a digital nomad, it’s important to have easy shareability of files with other devices and Apple has given me a hard time doing so in the past. I have been using Lenovo Yoga 300 2-in-1 Laptop for the previous 2 years and cannot love it more. Its 11-inch screen size is just perfect to carry with me no matter where I go. What’s better is its 2-in-1 Laptop plus Tablet feature which allows me to use it as a laptop at home and a tablet while traveling on a bus or a plane. As far as its hardware capabilities are concerned, it’s good enough for a photographer to use a few photo editing software and stories a few heavy files.
Lowepro Fastpack 150 AW: To carry the camera, the lenses and the laptop, I carry my Lowepro Fastpack Camera Bag which is ideal for digital nomads. I personally use Lowepro Fastpack 15 AW which is ideal to carry a 12-inch laptop, a DSLR camera with a lens attached, an extra lens and a lot of power chords, if you’re not stuffing a few clothes inside. There are a few bigger versions of the same series (like Lowepro Fastpack 250 and Lowepro Fastpack 350) for those who want to carry more than 2 lenses and a laptop bigger than the screen size 12 inches.
Lowepro has been my main backpack for about 2 years, and despite sitting on the floors of countless bus terminals and buses, it is fairly easy to clean it with a moist cloth.
1 x Toshiba Ultra 1TB: Short of being dropped, I find my Toshiba Hard drive very reliable, in as much as any non-solid state hard drive can be. I’ve used several in the past, and never had any problems – they’re also cheap and readily available.
When I have them, I place a bunch of silica gel packets amongst various electronic bags, to help keep dampness and humidity at bay.
Editing Software For Travel Photos
To get the most out of my images, I shoot in RAW – the difference in quality is worth the extra processing time, especially if you like to have more control over your images.
I use Adobe Photoshop CC 2015 to process RAW images. It’s quick and easy to use. Photoshop gives a little edge over Lightroom (which is another photo processing software by Adobe) when it comes to making minor changes in the photo: be it removing electric wires from a street photo to adding text in the images. I’ve been using Photoshop for years and didn’t find it necessary to switch to Lightroom.
If you’re happy working on a tablet I can suggest an app called ‘Snapseed’ for processing your RAW to JPEG. For an iPad, I’ve heard good recommendations about ‘Photogene’.
I keep a backup of all the edited files on my hard drive. As I mentioned above, I also keep uploading my images on Google Drive, with the eventual aim of having a full copy of images stored online (in JPEGs only of course) – so I’m not reliant on carrying my computer all the time.
I moreover change the file size of every processed image to 1200px jpg, compressed for web use. These can be easily emailed or uploaded to the likes of Instagram. Being obsessed with backups, I also make a second high res version saved at 3MB in size, which I keep on my hard disk or upload to my Google Drive when I get the chance.
Editing Software For Travel Videos
 I use Wondershare Filmora for editing my youtube videos. If you’re looking at youtube seriously, Final Cut Pro is what I will recommend (as most popular YouTubers I know, use it) but if you are just starting with vlogging or not taking it too seriously, Wondershare is a good video editing software — making editing videos quick and easy.
For editing videos on my mobile, I use GoPro Quik App. Though Wondershare Filmora also has a mobile app that I’ve seen many travelers use, my choice of a mobile app is Quik which allows you to add up to 200 images, videos, and music to create a video with just a few clicks. One thing I love about it is that it automatically analyzes the images and videos you’ve uploaded to select the best moments, so just upload all you want to share and let the app do the cropping and synchronise the visuals with audio. It even lets you upload the final version on Instagram and other social networks without saving it on your phone at all.
Here are a couple of videos I have made using Wondershare Filmora…
Also Read: What Else I Pack While Traveling
If you too are a blogger and photographer and have more tips on travel photography equipment including cameras and other things, let’s share in the comments below.